Friday, June 6, 2014

Leave Your Mark

This project took the longest out of all the others I have worked on before. My plan for this initially was carbon-footprint theme. Then it changed to poverty. Seems like an opposite theme, but they are very much connected. I wanted to get the point across of what we [developed countries] do, will indirectly affect others in developing countries in our food choices, and other choices we make daily without thinking of the consequences. The main point of my piece was expressing food security. Many countries are having issues with it, because the population is growing to exponential that the soil is deprived of nutrients. Al Gore, environmental scientist, made a documentary explaining how the commercial industry for meat is accounting for a large percent of greenhouse emissions, as to 51%; pollution wise= 20%. He even explained that global warming would greatly slow down if more people turned vegetarian. Sadly, the meat companies have a firm grip on society. People do want to hear the facts, because of selfish reasons. There are many books, studies, and documentaries stating these facts, but go here for a deeper explanation: http://www.peta.org/issues/animals-used-for-food/global-warming/

Lakes, seas, and other bodies of water are drying out, and its estimated that by the time I am old and have grandchildren, poverty and starvation will take the lives of many more. Farmers will not be able to feed 10 billion people in 2050, because of the depleted nutrients in the soil, and arid climate. While many people ignore the ugly side of their actions as to where their trash goes, where their food is and comes from, and how much CO2 is emitting from their cars; the truth is landfills, slaughterhouses, and cancer are not pretty topics yet they are all becoming increasingly larger and harmful.
My ideas  continued to evolve, because it is a broad topic...

The beginning: The first step was making the canvas. This took approximately 2 days, because it was my first time using a staple gun, and the frame was large. I intentionally wanted a larger canvas to represent the world. Then coating it with gesso took about 3 days for the 2 coats [above picture]. The gesso was bumpy, but I did not mind the texture, so I chose not to sand it down. During this step I had time to think of ideas while I was painting.


Middle: Next I found magazine cutouts all from National Geographic. These pictures are classics, such as the one of a refugee girl from Iran, back from the 1980s. *in progress shown above* I did not want pictures to be so graphic, yet I wanted to display poverty and starvation as real as it is. I loved seeing the good and bad of cultures, and exotic places all together.

End: Meanwhile, I painted a large white foot on the bottom right corner. Then made a stamp of a banana, because it represents me. This was my favorite part of the piece, because I felt that it tied the whole theme together of making my mark on the world.

I hope that it will shed more light on the reality that many ignore, and someone will begin to see how their trivial actions on the world do matter. I turned in my piece to the Halle Cultural Arts Center, and I am selling it at an unlimited price. I am planning to auction it to the highest bid, where 20% will go to the Halle, and 80% to UNICEF. This will provide children with food and water. I like this idea so much, that I am most likely going to donate the money with every piece I make! Everyone has a talent, and gift, and their purpose is to help the world, and leave our positive marks.
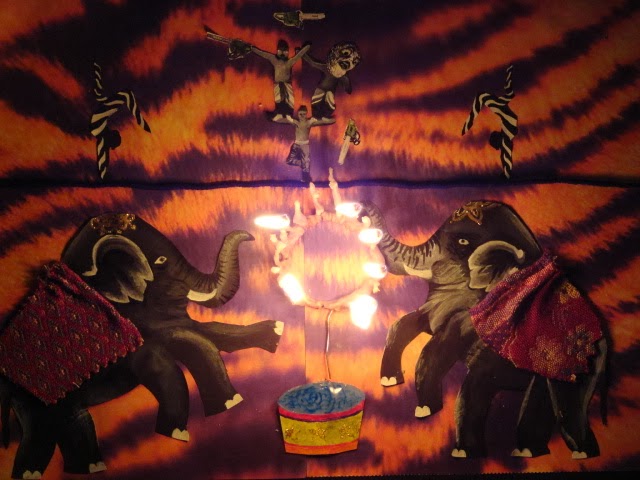
Final Piece--->

Thursday, May 15, 2014

Perspective: art 3


For this project my group and I collaborated on making a perspective mural. We thought about placing words that would attract attention, such as words in different languages. We even thought about strange phrase like 'the whole enchilada' to 'no dating in highschool'. We wanted it to be a word that could only be read at one angle. This was inspired by the Incredibles (yes the litte-kid disney movie), in the scene were the main character (the dad) is in an underwater cave and sees a word on the walls revealing a hidden message.

For materials we first thoughts about using chalk, but faced some challenges with the janitors. It all worked out, because we thought of duct-tape. It was a great medium and very simple. Since the farther wall is smaller than the one closer to us we needed to place more tape to make the lines thicker, in order to be the same size as the letters closer to us. To have this word projected and know where exactly to place the tape, someone would stand behind a card-board poster that had the word PRIDE cut out. We would then use the bricks as measurements. This was the hardest part about this project, since we are all different heights we will see the projection differently. This caused a lot of confusion and mis-communication. After realizing this we then tried a lazer-pointer, but it was so hard to see. Then we just resorted to imaging where the lines would be and then go from there (yes, basically winging it). 

I really liked how it came out. We bought over 10 rolls of duct-tape. We wanted to fill it in with white, but that would cost more money. I would definitely try this same concept again in the future. To finish off the project we then taped down cougar (school mascot) paw prints on the floor to show where to stand to see the word.
*The first 3 pictures is the in progress phrase, but the video is the final outcome.

Saturday, May 3, 2014

Art 3: News Reports

Years ago I heard about a mother who drowned her young children in the bathtub. This story has always made me so upset so channeling it into an art project would be perfect. I want to branch out and really capture this murder through video. My idea is to have a clean/empty bathroom and have the camera slowly come to the bathtub, but as it comes closer video clips from old videos of mothers with their children inspired by Flowers in the Attic. 3 rubber ducks {representing the children who died} are floating, but someone will be laying at the bottom and will grab them squeezing the air out. I want to background music to be the first 60 secs of "Carmen" by Lana del Rey [https://www.youtube.com/watch?v=L6K8Uq88BEQ], which the lyrics representing the mother's point of view.
My video will be less than 1 min, and my purpose is to express the sadness and grief of the unstable household and mental problems.

Saturday, April 19, 2014

Watercolor

I have always painted with acrylic, but recently I have tried out watercolor.

I need more practice on showing texture, and using less water. On some parts I mudded the colors, because I either blended too much or added too much water. Hannah and I added our paintings next to each others in the art journal that is sent around the country (and Australia I think). Maybe someone that sees it will understand what FullyRaw is. 
My inspiration to do this was when I saw a painting of just a hummingbird, but I put my own twist with the bananas which are a very important part of FullyRaw. I also added a branch just to breakup the composition.

Art 3: Update on Time Project

Final Outcome:


acrylic painting (no transparency) --->

1. When did you step back and analyze you work during this project? 
I did 2 practice runs so that I would get the real feel of what the end product would look like. This helps to leave room for error before continuing onto the final piece (final piece above pics). With my rough-drafts I would see what I did and didn't like. I didn't like the original color scheme, because the colors where not contrasting as much as I wanted. The colors where also smearing on the papers. I realize these flaws and was able to do a second practice to fix them. When it came to starting the final I was aware of the problems I had to be cautious of.

2. Did you use technology as a tool?
I used the elmo projector to adjust the size of the projection to fit the size of the paper. I was able to line up the lines from both the young and old face so that the face size was similar. This helped the process of overlapping them so that the lines were aligned. 


Thursday, April 10, 2014

Art 3: Perspective Project

Idea: Spelling "Pride" at a slanted angle which can be seen and read when standing at a certain point.
We will then color it in using diy chalk paint in school colors, and make the outline and letter shape in the letter style from the school logo. The diy chalk paint is simply cornstarch, food coloring, and water all mixed together. This way we can paint the letters, making it faster [unlike using chalk], and be able to customize the colors how we want.

Team: Michelle, Marissa, Madison, Ryn, and Rocio

Examples: This link shows perspective drawings, with the same concept we are doing:

http://weburbanist.com/2009/08/28/amazing-designer-plays-with-perspective-for-decades

Pictures: coming soon.

Friday, March 14, 2014

art 3: Time

using the projector to get a bigger picture-->

Practice test -->

young, old, and the mix-->
layered on top. warm=baby cool=older-->

I tried something that I wasn't sure was going to work. At first I wanted to make the faces next to each other, but when Mr.Sands got an idea that maybe I could put them on top of one another, I tried it out and it worked. It didn't occur to me that I could use transparencies. I have been used to always going to a medium of paper, but never plastic! This project helped me take a risk and branch away from using paper. I learned that acrylics do adhere to transparencies, and that when using contrast colors (warm v. cool) to show several images in one it can give great shading effects.

I did use a source but then made it my own. Printed pics from online of a baby and an old man to really get different variety within the ages. Then using the paints, transparencies, and the projector I was able to change the pictures and give it a new meaning that represents time. I only traced the outlines of the online pics, but when in and did my own shading to bring the two paintings together.

I will come back to this project and make an actual mix of both, because after doing further evaluation I think I can actually make a middle aged person by mixing the very old and young features together, so on a 3rd transparency I will paint a mix of all the areas with color, leaving me with a face with an in-between age. I would like to try this out using pictures of myself and seeing the physical change between younger and present time me.


Monday, March 3, 2014

Chick The Skeleton

While Mr.Sans and all the other art teachers were gone I worked on some charcoal drawings with Jessica. Mr.L was the best substitute and he even gave me some good advice for my drawings.
This was just casual sketches not a long project:
here i used pastels to make a butterfly wing->


skull & pelvis. The hardest was the pelvis because of the texture, cracks, curves, and indents. :

I liked this one because i was familiar with the cylindrical shape. femur->

Tuesday, February 11, 2014

Appropriation Project: A Pair of Pears

1. Artists create original artwork:
As a table everyone was thinking of ideas, but independently. At the end we collaborated and shared.
My ideas were butterfly, (a butterfly made of butter, but on a pan so that it its gliding across the pan). Mine were also a gun made of candy, a terrorist made of cotton candy. As a group we thought of things like surfing the web, where there was a surfboard on a spiderweb.
I was thinking about a play on words, when I thought of homonyms. I thought of a pair of pears! I think its goofy and hilarious even though its really basic.

2. Artists collaborate:
We all try to bounce ideas around. Collaborating can be tricky because some people may disagree with you and not see your vision. Explaining your idea thoroughly helps the communication among the group. Having everyone add to the conversation is important. I think collaborating ideas is fun and very effective!

3.  Artist develop art making skill:
As a group or class, if we have good communication and everyone makes an effort we can think of innovative materials to incorporate into our work. As a table we mentioned using materials like balloons, wax, candy. What is interesting is that when we talked about these mediums, we also thought about covering these things with the innovative material. What I analyzed was that we could carve the candy. We can, for example, take a giant gummy bear and carve it into something that goes with the idea/theme/subject. Actually carving into these mediums makes it more special, not just covering the piece in it.

     2-11-14: For my Appropriation project my final is a pair of pears leaning against each other. I will try to make them curve with each other in the picture so that the audiences eye doesn't steer away from the piece. For my medium I am going to use acrylic, and a palette knife to get a good texture and application. For the pears I will stay with a palette of greens, yellows, blue/purples and brown/tan/black. For the background I will have peachy colors, with orange, red, and light pinks, with nudes. This will give a good complementary colors. I like incorporating and showing as many colors as I can that work together. This helps show more vibrancy and it gives off an abstract feeling to the piece.

Sketch & plans:


My attempt:


The red is too over powering so I think I'll leave the background just white with shadows OR experiment with a light orange-red. What I didn't realize was that I was painting with complementary colors that were still wet. It took about three to four quick attempts and some help from the art teachers Mr. Sans and Mrs. Rossi to help teach me how to bend the colors together without mudding or harsh bands. Also I ran into a problem when I didnt like the look of the painting, Mr.Sans figured out it was the light source. I painted on top on the right pair with a lighter green to balance out the light source. I am still working on it!

3-1-14 I have finished my pairs, I added a shadow, but I am debating about the background. So far its just white with shadows.
The base ->

almost done, not quite there ->
added a light blue and shadow, trying to control painting w/ just one/ two light sources-->

zoom in-->
march 14th-->
Looking at the pictures now I feel like changing the left shadow and making the background color more of a happy and bright blue. I ran into a problem towards the end of this project; I realized my light source was off. Next time I have to remember to think about the light source when planning out the design and composition.


Tuesday, February 4, 2014

Art3: Tension

With the tension theme I chose to go with a circus setting, and having people balance on a tightrope on one foot while having two people on their arms juggling chainsaws on fire. So far my materials have been wire, black yarn, fabric, printed paper, and acrylic. I tried to show a symmetrical compositions but putting elements in it that would throw off the balance. For example, the person on the top right is positioned to reach something, because I will later draw/paint in chainsaws on fire, but this juggler lost balance and drops the chainsaw, creating the tension. Also the elephants have different patterned fabrics. The elephant on the left has three arms but the elephant on the right has three legs.
Later I am going to add two more people on the left and right of the tightrope. I am debating where to have them positioned as semicircles or at about 45 degree angles in so their bodies would point to the bottom center of the picture to show the triangle in the composition.

Still working.. its taking FOREVER!!


 I added glitter glue, and made a candle sort of thing for the ring of fire. Maybe I can change Mr.Sands perspective on glitter.


The first try on the candle idea failed... :(


To fix this I tied strings around the ring and went through several coats of wax. I also made sure to make the string wicks longer to make it last and have something thick for the wax to adhere.

Yay finally; the fire element worked!


1. Artists take risks:
While in the process of creating the design, I loved the idea of the ring of fire. I feel that the ring of fire at a circus adds so much tension. I really wanted to add it to my piece, but I didn't think it was possible. After I finished the actual painting, I thought the project still needed something more. Fire! I went back to thinking more about the fire element. Birthday cakes inspired the design of the the ring of fire. Using wax, wire, and string I made a candle sort of piece to be the ring of fire.
This was a big risk because it could have burned my whole project. I had never used any other type of medium than things I could control. Controlling fire can be very dangerous, but it all went smoothly.

2. Artists communicate through their work:
Conveying the feeling of tension can be taking different routes. Typically disturbing or odd pictures can cause tension. Other times you could paint things thats a big problem. One of my ideas was painting a scene from a third world country, or poverty. Those tense subjects would definitely be see through the art piece. But then when someone mentioned "tightrope"  ideas starting coming. A circus, fire, 5 foot animals, chainsaws, representations of the thrill and tension in a circus. They all create tension in a busy circus that leaves an audience in awe.

3. Artists solve problems:
As mentioned previously the first attempt on the ring of fire didn't work at all. This didn't make me feeling like quitting on the ring of fire, because there had to be someway to make it work. My motto is "What like its hard?" so I just needed to make a new one. I just melted some wax, got some string, and with the help of Mr.Sans (an expert at candle making) I was able to make another ring of fire before class ended!

Art 3: Sketch idea 1


For this idea of incorporating text into art, my group and I thought of many ideas. We thought of painting a person spray-painting a brick wall, but having the colors from the spray can come out as colorful words like "art", "inspire", "express", "color", "orange". There was also the idea of training dolphins to jump at certain curves and positions so that when they would all jump a word would appear. Then there was the idea of using shoelaces to spell out a word on converses, which lead to the idea of the sketch above. The idea of using string or laces to wrap around objects. So an example of doing this was sketched out. The way this would work is to have the supporting strings the same color as the object to let them camouflage, but having a bright color standout but only have this color on the lines and curves that would spell the words.

Saturday, January 11, 2014

Book Carving

Prompt: Explain how you developed your design for your book carving. How important was it to have a clear plan before starting? 
 I spent more time researching book carvings and finding ideas then carving the book. Since you are cutting, you want to make sure that you are 100% sure that you are doing it right. Once you cut it, its unattached forever!!
There are hundreds of styles to carving your book. There's a panoramic, outside carving, taking several books and carving, pop-out, or carving it inside. I thought about doing the panoramic style, but the directions didn't make sense to me.
I chose the pop-up style, because it was different then everyone else's. Also, I wanted to have enough time for detail and being careful when cutting, and this style is less time consuming as far as planning goes, which means that I was able to just cut. The other style seemed four times harder, because once you cut something wrong you had to tear out that number of pages, and the process was incredibly confusing. I knew that I wouldn't have had enough time to focus on the details and making the paintings and cuts intricate. 
My idea process:
With the panoramic style in the beginning, I thought it would be great to not make little carvings to make images in the book, but actually make carvings in it to make the book become an image.
Something in a panoramic shape would be a carousel. My birthday was coming up around this time the project started. When I was younger I had this little fancy carousel jewelry box, I got it for my birthday, but it was stolen when our house was broken into. So I thought that if I did the panoramic style I could make it one big carousel! Once I started trying to plan and research instructions, it became really hard. I had to cut every page of the book in order for this to work. I wanted there to be different designs on every page because thats how I would be able to make the carousel. I had to think of something else.
My second favorite style was the pop-up book! So I went with it. I wanted to still incorporate the carousel, so I thought about continuing the amusement theme, and make a fair, but I thought it would make it cuter by adding some feeling so I thought adding a couple kissing and the Eiffel Tower would make it special.
 
What were the challenges you faced when working on this project? Explain how you overcame them. 
 The most challenging part is curved lines! Curved lines are hard, and take time to do right. To overcome this obstacle I had to go little by little, and practice on tracing, so that I was comfortable with the lines, so I knew the shape better. 
I went through planned out steps: 
1) think of a theme 
2) choose a style and make your layout and design
3) cut tracing paper, proportional to the book (to the area you will be cutting). Practice your final design on the tracing paper. This is the time to add things, or adjust the design.
4) lay the final tracing paper over the book and cut away!
5) add paint, found materials, etc.
 Done! (touch lines up here and there with the exact-o knife)
 
Discuss your design and how it relates to the book you chose (if that was the case, if not just discuss design). Did you take any risks? How and why? 
 The book I used was actually a dictionary. It didn't relate to my carving, which was Love in Paris (a summary title for my book's theme). 
I did not take any risks with this project. Honestly, I am not understanding how to take risks.

Describe how you felt about the overall project and if you felt it was successful. 
I felt good about my project. It was what I wanted to do, and how I imagined it, even if I did not take a risk. I always feel like I can add more to it, but it never works out. I wanted to have lights on it, but there was no way it was going to fit on to the book. There's more that I could've done to make it stand out. My favorite part is the painting. I spent time on it and I was careful with it. Painting it made it look so much better! Also I am glad that I was able to put in a plastic wrap paper to make the water in the river. It looks really cool and realistic when the light shines on the plastic.